Category Archives: Ski Technique

Foot steering vs leg steering

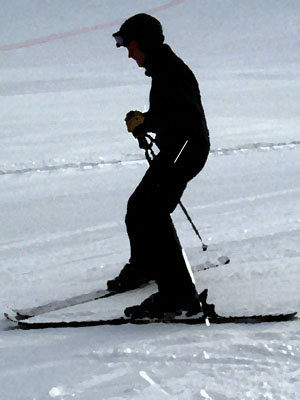
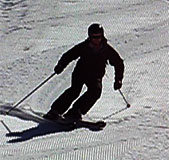
Although the word steering covers any of the 3 elements that make a ski turn (pressure, edge, rotation), we are using it to mean rotational steering in this article. In other words, actively turning the ski to change its direction.

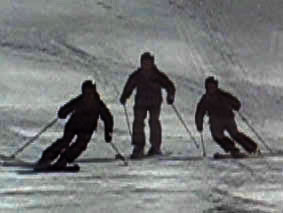
We use rotational movements whenever we want the ski to turn quicker than it would using purely carving movements (pressure and edge). Short turns and moguls are two common applications of rotational steering.

Rotational steering is taught early in the learning process, during the snowplough turning phase. And yet many instructors fail to pick up on the differences between two flavours of rotation: foot steering and leg steering.

Foot steering, as the name suggests, involves turning the foot alone – the knee and upper leg move very little. To get a feel for foot steering, stand relaxed on a smooth floor and twist your heels from side to side (you may need to raise your heels slightly to overcome friction). You should notice that each foot and lower leg twists from side to side, but the rest of the leg hardly moves. You get an even better feel for the movement by twisting one foot at a time.

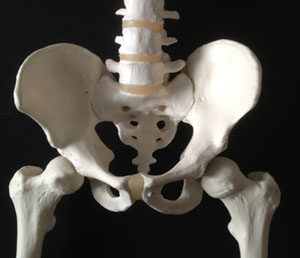
In leg steering by contrast the whole leg is rotated from the hip socket – the knee, lower leg and foot all follow the movement. Again, stand on a smooth floor and move your knee from side to side (you may need to raise the front of your feet slightly to overcome friction). The whole leg – ankle knee and femur – is moving as one unit. Make sure you don’t twist the pelvis (sometimes called hip steering).

So what are the pros and cons? Well, foot steering is a relatively weak movement using small muscles. It has problematic side effects. It can result in over-steering and also you should have noticed when you twisted one foot inwards that it causes tension in the lower back and pushes the hip outwards. The tension causes a blockage in the upper/lower body separation, restricting movement. And the hip push flattens the outside ski, losing edge angle and pressure and causing the ski to skid more. You should also have noticed that turning the outside foot (inwards) is easier than turning the inside foot. This can make it difficult to keep the skis accurately matched with the inside ski often ‘hanging’ and catching.

Leg steering on the other hand uses the big muscles of the upper leg and creates no tension or movement in the hips and pelvis. It also promotes stronger angulation and countering.

Check this out in your own skiing and see if you can feel the difference. If you are an instructor, you may be able to see the residual effects of foot steering in your intermediate groups. When you have a feel for the two different movements on a floor, it should be easy to try them on skis and compare the outcomes. If you’ve had a tendency to over-steer with the feet, you should find that changing to leg steering will produce far more powerful and fluid turns.


3 keys to expert skiing

Watch an expert and an intermediate ski down a slope. Which 3 key movement patterns distinguish their performance? You can probably think of quite a few, but these are the ones I always look out for.

Turn Shape

Skiers making Z shaped curves down the slope instead of S shapes are not using the design of the ski to influence speed and direction. They will twist the skis too much at the start of the turn, then use a whole load of effort to control the resulting sideways skid. It’s inefficient and tiring. By contrast, experts use a patient entry into the turn, establish the correct initial steering angle, then let the ski do the work for the rest of the turn.

How do you improve turn shape? Firstly, try counting 1,2,3,4 through each turn. By the count of 2, your skis should be pointing down the fall line – no earlier!

Secondly, follow the tracks of an expert down the slopes for a while. Make sure you find someone who is willing to go at your speed, or you will be fighting just to keep up. Most of my intermediate friends say they ski better following me – that’s down to turn shape.

Crossover

Crossover describes the movement of the body across the skis during the transition from one turn to the next. At the crossover point, the skis are flat on the snow as they roll from one edge to the other.

There are two crucial parts to crossover. Firstly, the body must move down the slope, to the inside of the new turn. At some point it must be perpendicular to the slope, otherwise the skis will not release into the new turn and the skier will end up twisting or stemming. Experts use the flattening of the skis at crossover to establish the correct steering angle for the upcoming turn.

Secondly, the body must release into the new turn at the correct diagonal angle. Beginners and intermediates are usually taught to point the body down the fall line, but in reality the body needs to move in the direction of its momentum. So, long radius turns will have a shallow angle of release, with the body moving more or less along the direction of the skis. Short radius turns will have a steep angle of release, with the body moving across the skis, more directly down the slope.

Two good exercises for crossover are one-ski turns and braquage (pivot slips).

For one-ski turns, traverse across a slope, lift your downhill ski, then turn. You will only be able to launch a turn if you commit your body down the hill. Then repeat on the other side. Eventually, you will be able to do away with the traverse, and link one-ski turns together.

For braquage, sideslip down a slope, then twist the skis into the fall line, then continue to twist into a sideslip on the opposite side. If you don’t crossover correctly and get your body perpendicular to the slope, the skis won’t release and you will end up doing mini-turns. After a bit of practice, you should be able to go straight down the fall line in a corridor no wider than the length of your skis. Well, probably a lot of practice – there are quite a few instructors who can’t do good braquage.

Angulation

Intermediates don’t angulate enough – or in some cases at all. The principle behind angulation is this: you need to edge the skis to make them turn. The more you edge them, the more you turn (see carved turn radius). Simply banking the whole body into the turn doesn’t produce enough edge angle, and it transfers pressure to the inside ski which makes the skis skid instead of gripping.

Angulation means breaking the body at the pelvis/hips, so that the legs are at more of an angle than the upper body. Imagine a triangle between the shoulder, hip and ankle and you’ve got the idea. Countering, in which the pelvis and hips are rotated slightly to the outside of the turn, will improve angulation – imagine sitting to the side on a stool.

And when you angulate, you had better make sure you have a relaxed lower back, otherwise you will struggle with incorrect pelvic tilt.

How to practice angulation? Here’s one good exercise: hold your ski poles like swords, then as you turn, draw a line in the snow to the side with your outside pole. You will only be able to get the pole to touch the snow if you angulate properly.

To get a better idea of the position for angulation, try this. Stand sideways about 1 to 2 feet from a wall. Now let your body fall towards the wall so that your hip is resting against it. That’s angulation! To get an idea of how countering feels, repeat this, but with your toes pointing slightly more to the outside than your heels.

Or try this: stand next to a wall or some other support; make a BIG snowplough shape with your legs; now move just the inner leg/foot parallel to the other while supporting yourself against the wall with your arm. The resulting position is a countered, angulated, parallel stance. Get this: 90% of an expert parallel stance is already there in a snowplough!

To summarize: although there are many elements to expert performance, concentrating on the 3 key points above will get you well on the way.

Steering angle

The term steering angle is used a lot in these articles.

It’s a simple concept. Most turns aren’t fully carved. The skis are rotated through an angle prior to engaging the edge to start carving. That angle is called the initial steering angle. If you want to carve a turn with radius shorter than the capability of the ski, you will need to establish a steering angle first. The shorter the turn, the greater the initial steering angle. Look at pictures of World Cup racers and you will see them using steering angles all the time (see Ron LeMaster Ultimate Skiing).

There are three ways to establish a steering angle at the beginning of a turn:

  1. Rotate the skis while they are flat during crossover
  2. Jump the skis round in the air
  3. Use an uphill stem followed by a step of the inside ski

Again, you can see examples of all of these in Ron LeMaster’s Ultimate Skiing.


Conquering crud

Crud: heavy powder, slush, breakable crust, chopped up ruts. Nightmare or challenge?

With a few simple rules you can sail down slopes where lesser mortals flounder. You may even have a smile on your face as you pass by. 🙂

Rule 1: The skis must not move sideways. To clarify: the skis must not move sideways edge first. If you try to twist the skis as you would with a skidded turn, the edges will catch and down you go.  The killer technique for crud is to tilt the skis on a big edge angle and push down and out. The skis may move sideways, but it will base first – pushing the snow away to the side like a snowplough. If you’ve been on a Snoworks course, you will recognize this technique – they even call it pushing.

Rule 2: You must be balanced at all times. Crud is rough and unpredictable. If you are slightly off balance and hit a change in the snow, you will end up more off balance, and eventually crash – or tire yourself out making lots of recoveries. A wider, lower stance generally gives better balance. When you do hit a change in the snow you can make quick fore/aft changes in balance just with a movement of the ankles – push the feet forward or backward underneath you accordingly as the snow slows you down or speeds you up. See Ultimate Skiing (LeMaster) Chapter 5 for details of these fore-aft adjustments.

Rule 3: The skis must leave the snow to start a turn. It you try to initiate a turn in crud by twisting the skis, you will catch an edge and crash. Or if it’s too heavy to twist, you’ll just carry on in the same direction and the turn won’t materialize. You need to get the skis out of the snow to steer them. The idea is to jump the skis out of the snow, rotate to establish the new steering angle, tilt to the edge angle required (usually a lot), and land on the new edges ready to start pushing to the side (see Rule 1). If the snow is not too heavy, you might get away with a big unweighting rather than jumping. It takes a bit of practice to coordinate the jump-twist-tilt movement, but once you’ve mastered it, you’ll be amazed at what you can ski. Alternatively, if you’re not confident enough to try the jump, stemming allows you to place the skis one at a time into the new turn.

So use the rules, practice a lot, fall a bit, and you’ll soon be seeking out crud on a search and destroy mission instead of dreading it.

Remember though, heavy snow creates greater twisting forces on the body and its joints. So don’t overdo it. Let discretion be the better part of valour. As Don Whillans once said: The mountains will always be there, the trick is to make sure you are too.


Pelvic tilt

Incorrect pelvic tilt has interested me for years. It often goes undiagnosed and can be the cause of many technical problems for skiers. And it’s not just a beginner’s problem. I skied around for years with exactly this issue. I must have disguised it pretty well – none of my coaches, trainers or examiners picked up on it. I knew I had a problem: my left turns skidded more than my right turns. I’d figured out that this was due to my right hip pushing out when I tried to angulate in left turns and this flattened the ski causing loss of grip. But try as I might to angulate more, it seemed to make the problem worse. I knew there was a blockage somewhere, but couldn’t isolate the cause. Then quite by chance, while I was working on pelvic tilt in another context, I noticed my hip problem had gone away! It also cured a peculiar left arm position that I had – kind of hanging out to the side and back when turning left – but I never connected the two. The moral of this story? If you have a problem with pelvic tilt, you may find it difficult to diagnose, even with video feedback and help from an instructor.

Pelvic tilt is rarely mentioned in manuals and books. Ron LeMaster’s update to The Skier’s Edge, Ultimate Skiing now has a brief treatment of lower back posture (pp 62-3). Lito’s Breakthrough on Skis has always mentioned a relaxed lower back as a pre-requisite for separation of upper and lower body. And R Mark Elling’s The All Mountain Skier has a paragraph tucked away at the back describing hollow back syndrome and “dinosaur arms”. But by far the most rigorous treatment is in John Sheddon’s 1982(!!) book Skillful Skiing. I’ve always been impressed by Snowsport England’s approach to skier analysis, and John’s book still leads the way – 30 years on!

So what is pelvic tilt and why is it important? Your pelvis connects your legs to your upper body:

The angle of the pelvis is controlled by the muscles in the lower back. Excessive tension in these muscles causes the pelvis to tilt either downwards (anterior) or upwards (posterior) relative to its neutral, relaxed position, thereby blocking independent movement of lower and upper body.


A skier with excessive downwards pelvic tilt. Note the hollow back, shortened arms and pulled-back shoulders. This skier will tend to move torso and legs together as a unit and will not be able to angulate properly to edge the skis, causing excessive skidding.


Excessive upward pelvic tilt looks like this. It is less common than downward tilt. This skier will tend to sit back, causing excess pressure on the back of the skis, making it difficult to turn without using the whole body.


But it’s not always as obvious as this.


Does this skier have a problem? Look out for odd arm positions, asymmetric left/right turn performance, and outside hip sticking out.


So, if you think you might have incorrect pelvic tilt, how do you cure it? It’s all about relaxing the muscles in the lower back. Imagine someone has just whacked you in the stomach – oof! The resulting posture – stomach pulled in, shoulders and arms forward, lower back relaxed and rounded – is a great ski position. And if you don’t have enough imagination, get someone to whack you for real …


Why does my ski judder?

This is a fairly common question from intermediate to advanced skiers who have graduated on to skiing steeper, icier slopes at higher speeds.

The physical cause is too much pressure on a ski which is moving sideways, making it alternately grip then release in an oscillatory fashion, especially towards the end of the turn, when the pressure increases due to combined centrifugal force and gravity. The effect depends on the ski’s stiffness and damping, but it can be quite spectacular!

From a technique point of view the problem is caused by over-rotation resulting in the ski moving sideways, plus too high an edge angle for the applied pressure. The solution is to make rounder turns, especially in the all-important control phase (initiation through to fall line), so that the ski is moving forward rather than sideways, and to use the turn shape, rather than skidding, to control speed. It also helps to flex and relax the legs towards the end of the turn to absorb some of the pressure. If you need to skid the turn a bit more, try less edge angle so that the ski doesn’t try to grip as aggressively.